Friday, June 18, 2010

Finally my book is done.


Finally, finally, my book is out for sale and with an ISBN #  I've been on and off working on this book since 2001.  This is my first edition but I am planning on a 2nd edition by the beginning of next year, 2011.  This book is 64 pages and the content or the interior of this book is 64 pages.  Right now, anyone can purchase it on my lulu.com webpage at  the following link.  http://www.lulu.com/product/paperback/houses-of-worship/11384424  

I am currently working on a 2nd edition with more photos.  and I am adding a new feature in the book.  

First of all this book is about religious facility, churches, synagogues through out Macon.  My 2nd edition.  I am planning on adding more churches and photos of interior of these churches and house of worship.  I am relieve that I finally have a completed book out there for sale.  and I would like to thanks Lulu.com for making it happen. 


Friday, June 11, 2010

Dome House using Rebar for Framing

How to build a shelter dome part 2?

I'm still searching the internet on How to build a shelter dome inexpensively.  So far, I've been really inspired by www.pacificdomes.com  But their prices are expensive for me. But their dome kit comes with everything you need.  I wanted a second opinion.  I found this great website that teaches you how to build your own or atleast gives you an idea on how to do it yourself with pictures.  Although his method is for temporary or emergency shelter.

Framework for the Shelter dome.
.5" x 10 ft, conduit pipe.  


Here is how you cut it, NO don't even think about using a hacksaw! You will make ugly cuts and screw up the pipe when you clamp it down in the vice while sawing on it. Using a plumbers pipe cutter guarantees a perfect cut every time!


Now you need to flatten the ends so there ready to drill. Use caution when you start to flatten the pipe. You can't just stick it in the press or vice any old way. Look carefully at the pipe and you will find a welded seam. If this seam ends up at the corner of the flattened pipe it will split and if you drill through the seam it will split there as well. Just put the seam at a 45-degree angle under the press, vice, or hammer and the seam will cause you no problems.

Ok, conduit sections are cut to length, the ends are flattened, and were ready to drill! A simple jig will ensure all your holes are the exact length they need to be.

The last process involves removing burs and sharp edges and paint. Yes, I know. Conduit is galvanized and no need to paint it; except where you cut and drilled it! It will quickly rust at the ends. Another advantage is using two different colors between the A and B pipes. This will save you from considerable confusion and headaches later, I promise! You may paint the entire pipe or just dip the ends in the paint can.


Assembly of the dome elements is easy. All connections at each hub use a single bolt, washer, and nut.


When you start to assemble the dome don't tighten the nuts tight, make sure the joints can move a little so the dome elements can flex and automatically self align as you assemble them. After all elements are in place then go back and clamp them down tight. You will be amazed at how rigid the dome frame has become!

At this point you need to secure the dome frame to the ground. The cheap and easy way is to use "U" shaped rebar and a sledgehammer.


I prefer the www.pacificdomes.com way of securing your dome frame.  They use and L brackets to secure the frame to decking.  Ofcourse pacific domes shelters are more permanent.  

And ofcourse my plan is to create a hardshell for my dome by using mesh wire and poured concrete.  Maybe I'll even stucko the exterior after the concrete.  and definitely paint it white.  or maybe something artistic.  and something that will blend the environment.  cool huh?!


How to build a Shelter Dome?


I have been researching Shelter Domes lately.  And most of the shelter domes are really temporary shelter domes.  They are made out of some type of material.  But after watching a video on youtube on "Domes for the World", it reminded me of this documentary I watched on Discovery channel about five or six years ago.  This genius engineer was trying to prove people that it is not so hard to build a dome shape building.  and he actually prove this by building a dome shape structured building in one day.  And he executed this ingenious idea by using   flexible steel rods  and mesh wire and poured concrete on top of this weaved flexible steal rods.  He formed this dome shaped concrete building by having a balloon underneath this steal rods and mesh wire and pumped it with air.  So when the concrete hardened, it hardened in a form of a dome.  Smart huh?  Yep I remembered that.  And it reminded me when I watched the "Domes for the World" video on YouTube.com They are using similar techniques.  Without the mesh wire ofcourse.  And I want to imitate this.


I totally agree with using mesh wire on top of the shelter dome frame.  and maybe even in the interior.  But I do have an idea.

What if in the interior of the dome, you use a SPRAY FOAM INSULATION, prior to applying the exterior concrete.  I think this technique will help hold and form and exterior concrete.  And then just sand the interior foam insulation for a smooth surface.  and use stucko on top of the foam and then just spray pain the inside.  This will give you a hard shell instead of using some type of vinyl or canvas material.  and I think your Shelter dome will last longer and stronger.

ABOUT WINDOWS & DOORS
I want circular windows.  So I'm thinking of executing this by placing a plastic circular tube on certain areas prior to pouring concrete.

I think I just found my solution.


But I couldn't sleep so I did more research on Goggle.com and found this great article.  The same exact idea I have on building a Shelter Dome.  Check it out.

---------------------------------------------------------


How to Build Dome Homes

By Richard LaurenseHow Contributing Writer

Building and living in a dome house can be a fun and rewarding project. The dome house is a superior design than standard square homes, and the average dome structure will outlast the toughest conventional competitor. Dome homes have increased structural integrity, easier heating and cooling, and require less material to build than a conventional square home. The typical builder will spend about three weeks properly constructing a dome home.
Difficulty: Moderately Challenging
Instructions

Things You'll Need:

  • Socket set
  • 30 bolts and 30 nuts (1/4" or 5/16")
  • 65 feet of 3/4" electrical conduit
  • Saw
  • Tight wire mesh
  • Several bags of mortar-grade concrete
  • Wheelbarrow
  • Measuring tape
  • Marker
  • Arbor press


  1. Step 1
    Prepare a building site 24 feet in diameter by leveling and compressing the soil.


  2. Step 2
    Cut the electrical conduit into 30 sticks 6.5 feet long, and 35 sticks 7.4 feet long by using a metal saw to slice each section after measuring it. Label the 30 sticks "B", and the 35 sticks "A" with a marker.


  3. Step 3
    Flatten the ends of each electrical conduit pole by using the arbor press, so that the flat ends are in line with each other. Bend the ends toward each other at an angle of eight to ten degrees. The pole should have a slightly "C" shape to it.


  4. Step 4
    Drill a hole into each flattened end to accommodate a bolt of the proper size. The hole should be centered onto the flat area.


  5. Step 5
    Build the metal dome frame by bolting together the electrical conduit poles at their ends. Lay out the "A" poles in a decagon shape, with ten sides, onto the ground where the house is to be placed. This will give a diameter of 24 feet, and a total height of 12 feet, enough to house two to four people. Attach two poles to each vertex, to make a triangle out of each type of pole; make a triangle with the "A" poles, then make another one at the next grounded pole's end out of "B" poles. The result will be four poles to each bolt hole. Secure the struts with bolts, and screw a nut onto each one but do not tighten them completely.


  6. Step 6
    Attach the next "layer" of struts, connecting the tops of the triangles with "B" poles by securing them with bolts and nuts. They will make another ten-sided shape, and will be supported by the rigidity of the structure below it. The next layer is a "B" "B" "A" pattern, with the tops of the first layer's "A" triangles meeting the bottom tip of the last layer's "A" triangles. All vertices can be bolted, including the top, and all "B" struts should form a five-sided star for their side.


  7. Step 7
    Tighten all struts by turning all bolts and nut clockwise until they are firm. The structure will need to settle for about an hour, then be re-tightened. Welding the metal is optional, and may lengthen the amount of time it takes to complete the house.


  8. Step 8
    Cover the entire structure with wire mesh, and make sure it is tight and flat for each open triangle. It is recommended to double layer the mesh onto the dome. Leave holes for doors and windows.


  9. Step 9
    Mix the concrete in the wheelbarrow and begin to cover the dome, starting from the ground up. Cover the interior floor at this time, and begin to work the concrete up the walls as it hardens. The first layer can finish the first level of triangles, then be allowed to set. The second layer of concrete should overlap the first, and smoothed on the exterior to hide seams. As the concrete approaches the crest of the dome, it is possible to affix a final cap of concrete or a round skylight to the peak of the struts. Allow all concrete to dry and cure for the manufacturer's specified amount of time.


  10. Step 10
    Apply the windows and doors, and floor joists, if applicable. Once the dome is sealed, any interior treatment can be fabricated, such as walls, lofts, appliances, wiring, or flooring, to meet the needs of the builder.
Tips & Warnings


  • Use mortar concrete for a smoother finished dome.


  • Use safety equipment and precautions when working with power tools and concrete.


Read more: How to Build Dome Homes | eHow.com http://www.ehow.com/print/how_5522449_build-dome-homes.html#ixzz0qWc4gy8Y

Thursday, June 10, 2010

Domes for the World


Love their building techniques.  I've seen this done in discovery channel before.  The engineer wanted to prove that, it is easy to build a dome structure building.  He also used cement and balloon to build the dome structured building.  But He also used rebar and what it looks like chicken wire.

Domes for the World

Upon researching more about Dome Shelter, I ran into this video on www.YouTube.com about Domes for the World organization.  They are very inspiring.  Too bad they don't sell their techniques.  But it seems pretty simple enough, because the three videos actually shows you how they are done.  I want a village like that myself.  I can just imagine these dome homes on Tama-Re.


Sunday, June 6, 2010

Officer Joseph Weekley killed a little girl.


Officer Joseph Weekley

Officer Joseph Weekley, a member of the Detroit Police Special Response Team who was placed on a desk job after his gun discharged during a raid Sunday, resulting in the death of young Aiyana Jones.


That's what happened when a white man kills a little black girl.  He gets a desk job.  And they don't say that he murdered or killed a little or shot a little girl in the neck.  Nope, that's not how he's portrayed.  The media's chosen words in this case is "gun discharged". That's white people for yah!


Aiyana Jones.  Killed by police officer Joseph Weekly who got a desk job after killing her.


Inside my tote bag

It takes two bags to travel with these days.  Sometimes three.  My laptop bag seems to always go with me everywhere I go.  I guess by being a graphic artist, its just something you can't live home without.  Especially by being freelance and often working at your local coffee shop or where ever I can find a free wifi.  Anyway here's a pick at what's inside a graphic artist tote bag.

PSP.  Yes, it was meant for entertainment for your children and young adults.  But I do love my psp.  Whenever I have to show a my client  digital proof of their business card, instead of turning on my laptop which takes more time, I rather switch my psp and quickly get in and out of offices faster.  But my psp does keep me company on those long ride home in the greyhound bus.  It usually last between 5-8 hours of battery life and that's what makes it even perfect.


Sony headphones, book light, and additional battery for my laptop.  A necessity for traveling on the road and working.


I get carried away with USB cords.  Youll never know when you're gonna need one or two.


Since my daughter refuses to give me my Sony Cybershot Digital camera which uses a lithium battery, I'm stuck with this battery charger.  But what I do like about this charger is, you can plug it to your laptop via usb to charge it.  


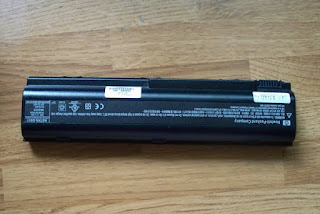
back up battery for HP 15" Pavilion Entertainment Notebook PC


two headphones, just incase you want to share your music to anyone.


USB diskettes, Coby USB enabled mp3 player, and RAC Lyra mp3 player.  
Love my Coby mp3 player because, it only cost me $19.95 for this little great device.  But it's not just an mp3 player,  it's also a radio, a voice recorder, and you can also use it to store data because it just plugs in to your computer via usb.  and it just needs one AAA battery to run for hours.  I use a rechargeable battery. 

My RCA Lyra mp3 player.  I bought this thing for my daughter for almost $80-$100.  I hold on to it because it uses SD cards.  So you can have multiple SD card with different music and stuff.  But it does have an internal memory.  my screen is crack, I know.  


I love this wireless access to internet.  But cricket service sucks.  One day it just started no working.  And Cricket customer service couldn't figure it out.  They even sent representative who stated that it might be the tower and they are spending millions of dollars to install new ones.  But due to their lack of quality customer service I discontinued it.  I thingking about getting a virgin mobile one.


It allows you to plug in more usb device to your computer.


car cell phone charger 

I haven't use this thing.  I just thought it might be useful oneday.


PUSH light.  Needs two AA battery to work.  Love it.


and everything fits in my HP bag.  I bought two of these at Office Depot.  They were on sale for $5.00  It's suppose to be a bag for HP portable photo printer. 


Tuesday, June 1, 2010

Phthalate makes Men less Masculine?


According to CBS 60 Minutes U.S. Congress band Phthalate from toys after the researcher Dr. Swan stated that several baby boys suttle ways less completely masculine.  "What the Fudge!"  Did you get that.  So this female scientist is saying that Phthalate which is a chemical added to plastic to make it more flexible, makes baby boys gay? Was that right?

According to the video above, after watching it only once, there was a research done using rodents and found out that phthalate disrupt hormones activities, causes deform sex organs, low testosterone levels,
low sperm counts, hypho spadious and etc... 

Well according to Dr. Malachi Z. York.  Just get out of their way and nature will do the rest.  This is definitely another SIGNS OF TIME.  They are having a hard time reproducing and now their baby boys are becoming less masculine?  

Total Pageviews